
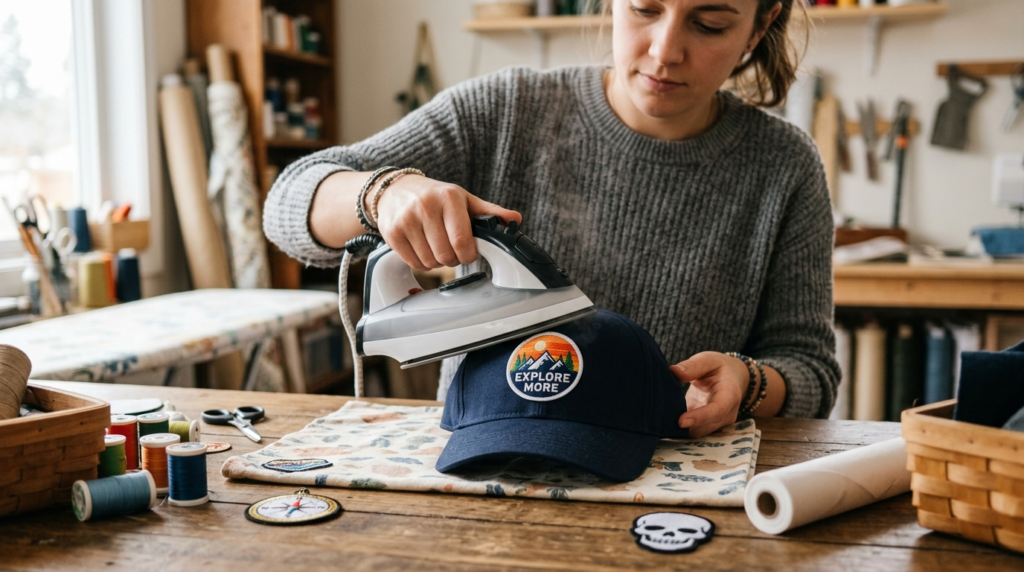
Adding a patch to a hat sounds simple — until the patch starts peeling off after two days or the hat ends up looking like it survived a kitchen accident. The good news? You can avoid all of that with the right method.
Whether you want to customize your favorite cap, promote your brand, or upgrade old headwear, learning how to iron a patch on a hat helps you create a clean and professional look at home.
Today, many businesses, sports teams, and fashion brands use custom patches because they add personality without replacing the entire hat. From embroidered patches to PVC patches and leather designs, patches continue to dominate modern fashion and branding trends.
In this guide, you’ll learn the safest and easiest way to apply an iron on patch to a hat while avoiding common mistakes that ruin both the patch and the cap.
Why Iron-On Patches Are Popular for Hats
People love patches because they instantly change the appearance of a hat without spending money on new custom products.
A simple patch can turn a plain cap into:
- A branded business hat
- A sports team accessory
- A fashion statement
- A biker or military-inspired design
- A personalized gift
Many companies also use custom hat patches for promotions because patches cost less than producing fully embroidered caps.
According to Brother International, heat-applied patch adhesives work effectively on fabrics like cotton and polyester blends when users apply the correct temperature and pressure.
Best Types of Patches for Hats
Not every patch works the same way. Some attach better with heat, while others require stitching.
Here are the most common patch types used on hats.
Embroidered Patches
These patches feature raised thread stitching and classic detailing. Many brands use Custom embroidered patches for logos, uniforms, and fashion hats because they provide a premium look.
They also work well with iron-on backing.
PVC Patches
PVC patches use soft rubber-like material instead of thread. They resist water, dirt, and rough outdoor conditions.
Many tactical brands and outdoor companies prefer PVC because the material lasts longer in harsh environments.
Leather Hat Patches
Leather hat patches give hats a rugged and premium appearance. They look especially popular on trucker hats and workwear caps.
However, leather requires lower heat because excessive temperature may damage the material.
Custom Silicone Patches for Hats
Modern brands increasingly use custom silicone patches for hats because they create a sleek 3D appearance.
Silicone patches handle outdoor wear well and maintain shape over time.
Materials You Need Before Starting
Before applying an iron on patch, gather the correct tools first.
You Will Need:
- Iron-on patch
- Household iron or heat press
- Thin cotton cloth or parchment paper
- Clean hat
- Small towel or folded cloth
- Flat workspace
Avoid using steam during the process. Dry heat activates adhesive more effectively.
How to Iron a Patch on a Hat
Now let’s move to the actual process.
Follow these steps carefully for better results.
Step 1: Clean the Hat Surface
Dust and oils weaken adhesive strength.
Use a clean cloth to wipe the hat surface before applying the patch. If the hat looks dirty, wash and dry it completely first.
A clean surface helps the adhesive bond evenly.
Step 2: Prepare the Hat Shape
Hats have curved surfaces, unlike flat shirts or jackets.
Place a folded towel inside the hat to create support behind the patch area. This keeps the surface firm during ironing.
Without support, patches may wrinkle or attach unevenly.
Step 3: Position the Patch Carefully
Place the patch exactly where you want it.
Check alignment before applying heat because removing a hot patch can become difficult.
Crooked logos usually attract attention for the wrong reasons. Unless you invented “abstract hat art,” accuracy matters here.
Step 4: Heat the Iron Properly
Set your iron to medium-high heat using the cotton setting.
Turn OFF steam completely.
Most manufacturers recommend temperatures between 270°F and 350°F depending on fabric type and patch backing options.
If your hat contains synthetic materials, reduce the temperature slightly to avoid melting.
Step 4: Heat the Iron Properly
Set your iron to medium-high heat using the cotton setting.
Turn OFF steam completely.
Most manufacturers recommend temperatures between 270°F and 350°F depending on fabric type and patch backing options.
If your hat contains synthetic materials, reduce the temperature slightly to avoid melting.
Step 6: Apply Firm Pressure
Press the iron firmly onto the patch for 20–30 seconds.
Do not move the iron around like you’re ironing dress pants. Steady pressure works much better.
Focus carefully on the edges because corners usually peel first.
For thicker custom patches, repeat the process once more if necessary.
Step 7: Allow the Patch to Cool
Cooling matters more than people think.
Let the patch cool naturally for a few minutes before touching it.
The adhesive strengthens during this stage.
Step 8: Check the Edges
Gently test one corner of the patch.
If you notice lifting or peeling, repeat the heating process for another 10–15 seconds.
Some thick embroidered patches require multiple presses for stronger bonding.
Common Mistakes to Avoid
Many failed patch applications happen because people rush the process.
Here are the most common mistakes.
Using Too Much Heat
Excessive heat can:
- Melt synthetic hats
- Burn fabric
- Damage leather patches
- Warp patch adhesives
Always start with moderate heat.
Using Steam
Steam introduces moisture, which weakens adhesive activation.
Dry heat produces better bonding.
Ignoring Fabric Compatibility
Some materials do not handle iron-on adhesives well.
Nylon, leather, and foam-front trucker hats often require extra care or stitching support.
Skipping Extra Stitching
Iron-on adhesives work well, but stitching adds long-term durability.
Many professional manufacturers combine heat seal and sewing together for better results.
Are Iron-On Patches Permanent?
Iron-on patches can last a long time when users apply them correctly.
However, durability depends on:
- Fabric quality
- Adhesive strength
- Washing frequency
- Heat application quality
According to Singer Sewing Company, combining heat application with stitching provides the strongest long-term hold for wearable patches.
For hats used daily, stitching around the border improves durability significantly.
Heat Press vs Household Iron
A regular iron works perfectly for small DIY projects.
Still, many businesses use heat presses because they provide:
- Even pressure
- Consistent temperature
- Faster application
- Better adhesion results
According to Stahls’ Hotronix, heat presses improve application consistency, especially for thicker patches and structured hats.
If you regularly create custom hat patches, investing in a heat press may save time and improve quality.
Best Hat Materials for Iron-On Patches
Some hats respond better to heat than others.
Best Materials:
- Cotton
- Denim
- Canvas
- Polyester blends
Materials That Need Extra Care:
- Leather
- Nylon
- Foam trucker hats
- Wool
Always test heat carefully on sensitive materials.
Final Thoughts
Learning how to iron a patch on a hat gives you an easy and affordable way to personalize hats for fashion, branding, sports teams, and businesses.
The process stays simple when you focus on three things:
- Correct heat
- Firm pressure
- Proper preparation
Whether you use embroidered patches, PVC patches, leather hat patches, or custom silicone patches for hats, careful application helps your design last longer and look more professional.
If you want maximum durability, combine heat application with stitching. That extra step can save your patch from peeling during daily wear.
And remember — if your first patch ends up slightly crooked, congratulations. You’ve officially created a limited edition custom design.
FAQ: How to Iron a Patch on a Hat
Can you iron a patch on any hat?
No, not all hats are suitable for iron-on patches. Cotton, denim, and polyester blends work best. Materials like nylon, leather, and foam-front trucker hats may get damaged under heat or may not hold the adhesive properly.
For more durable options, explore our range of custom patches designed for different fabrics and applications
How long do iron-on patches last on hats?
Iron-on patches can last several months to years depending on usage. If the hat is washed frequently or exposed to heat and moisture, the adhesive may weaken over time. Adding stitching around the patch improves durability significantly.
For stronger long-term results, check our patch backing options including sew-on and heat-seal solutions.
What temperature should I use to iron a patch on a hat?
Most iron-on patches work best between 270°F and 350°F (medium to high cotton setting). Always turn off steam and follow the patch manufacturer’s instructions if available.
If you’re working with premium materials like custom silicone patches for hats, always use controlled heat for best results.
Can I wash a hat with an iron-on patch?
Yes, but hand washing is recommended. Machine washing and high heat drying can loosen the adhesive over time. Gentle cleaning helps maintain the patch quality and shape.
For more durable outdoor use, custom PVC patches are a better option because they handle moisture and wear more effectively.
Why is my iron-on patch not sticking to the hat?
This usually happens due to one of these reasons:
- Low heat or uneven pressure
- Steam was used during application
- Fabric is not compatible
- Patch was not pressed long enough
- Hat surface was not clean
Reheating with proper pressure usually fixes the issue. For better results, consider upgrading to premium embroidered patches designed for stronger adhesion.
Do I need to sew an iron-on patch after applying it?
It is not required, but it is highly recommended for long-term durability. Stitching prevents edges from peeling and keeps the patch secure during daily wear and washing.
For a premium finish, many users combine stitching with leather hat patches for a more professional look.
Can I use a hair straightener instead of an iron?
Yes, for small patches you can use a hair straightener as a quick alternative. However, it may not provide even heat distribution, so results can vary compared to a proper iron or heat press.
For bulk or professional application of custom hat patches, a heat press is strongly recommended.
What is the best way to make a patch last longer on a hat?
For best durability:
- Apply correct heat and pressure
- Avoid steam during application
- Wash gently by hand
- Add stitching around edges
- Store hats properly without folding
For long-lasting branding solutions, explore custom silicone patches for hats and other premium materials built for durability.