

Iron-on embroidery patches are one of the easiest ways to upgrade jackets, jeans, backpacks, and uniforms without sewing like you’re starring in a 19th-century costume drama. Whether you’re fixing a tear or just flexing your style, knowing how to iron on embroidery patches correctly saves time, money, and a lot of frustration.
In this guide, we’ll walk through a clear, step-by-step process based on widely accepted textile care practices and fabric-adhesion principles used in garment manufacturing. No fluff, no guesswork—just practical instructions that actually work.
We also share insights from professional custom patch production standards used in the industry, including companies like Premium Quality Patches, which produces embroidery, PVC, chenille, woven, leather, and silicone patches for global clients.
What You Need Before You Start
Before learning how to iron on embroidery patches, prepare your tools properly. Preparation reduces mistakes and improves adhesion quality.
You’ll need:
- A household iron (no steam mode)
- Clean cotton fabric surface
- Embroidery iron-on patch
- Thin cotton cloth or parchment paper
Hard, heat-safe surface (ironing board or table)
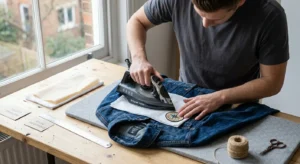
Tip: Avoid fluffy or uneven surfaces like beds. They mess with pressure and heat distribution.
Step-by-Step Guide: How to Iron on Embroidery Patches
1. Preheat Your Fabric
Start by heating your fabric for 10–15 seconds using the iron. This removes moisture and wrinkles.
Dry fabric helps adhesive bond better. Textile research and garment manufacturing practices confirm that moisture weakens adhesive performance during heat bonding.
2. Position the Patch Carefully
Place your embroidery patch exactly where you want it. Once heat is applied, repositioning becomes difficult or impossible.
Ask yourself:
- Is it centered?
- Is it aligned properly?
- Does it look balanced?
Take your time here. Rushed placement is the #1 beginner mistake.
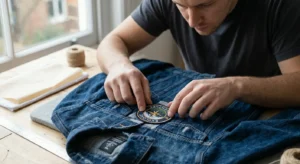
3. Cover the Patch
Place a thin cotton cloth or baking parchment paper over the patch. This protects the embroidery threads from direct heat and prevents burning.
Think of it as sunscreen for your patch—same purpose, less beach.
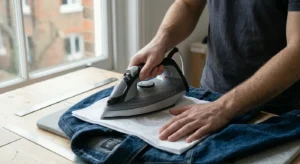
4. Apply Heat with Pressure
Set your iron to medium-high heat (cotton setting works for most fabrics). Press firmly on the patch for 20–30 seconds.
Do not move the iron around. Just press and hold.
This step activates the adhesive layer and bonds it with the fabric fibers.
5. Flip and Repeat
Turn the fabric inside out and apply heat on the back side for another 20–30 seconds.
This step strengthens the bond and increases durability—especially useful for jackets, denim, and backpacks.
6. Let It Cool Completely
Do not touch or stretch the patch immediately. Let it cool for at least 5–10 minutes.
Cooling helps the adhesive set properly. If you rush this step, the patch may peel off later.
Common Mistakes You Should Avoid
Even though iron-on embroidery patches are beginner-friendly, small mistakes can ruin the result.
1. Using Steam Mode
Steam creates moisture, which weakens adhesive bonding. Always turn it off.
2. Moving the Iron Too Much
Gliding over the patch spreads heat unevenly. Pressing works better than sliding.
3. Using Low Heat
Low heat won’t activate adhesive properly. Always follow fabric-safe high heat settings.
4. Washing Too Soon
Wait at least 24 hours before washing the garment. This gives the adhesive time to fully cure.
How Durable Are Iron-On Embroidery Patches?
If applied correctly, iron-on patches can last through many washes. However, durability depends on:
- Fabric type (cotton holds best)
- Heat application quality
- Washing method
For heavy-use items like workwear or bags, many professionals also recommend stitching around the edges for extra security.
At Premium Quality Patches, manufacturers often design patches with strong adhesive backings to improve longevity, especially for promotional and branding use.
Best Fabrics for Iron-On Embroidery Patches
Not all fabrics behave the same under heat. Some love it. Some… not so much.
Best Options:
- Cotton
- Denim
- Canvas
- Polyester blends (low heat required)
Avoid:
- Nylon (melts easily)
- Leather (needs special adhesive methods)
- Waterproof fabrics (adhesive won’t bond well)
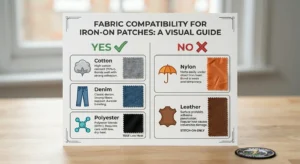
If you’re unsure, always test a small hidden area first.
Can You Remove an Iron-On Patch?
Yes, but it takes effort.
You can:
- Reheat the patch and peel slowly
- Use a thin cloth and re-iron to loosen glue
However, removal may leave residue or damage delicate fabrics. So think twice before placing it permanently.
Pro Tips for a Perfect Finish
Want a factory-level finish at home? Use these tricks:
- Press harder, not longer
- Use a flat, stable surface
- Always preheat fabric
- Avoid stretching fabric while cooling
- Reinforce edges with light stitching for heavy use items
These small details make a big difference in durability and appearance.
Need Custom Iron-On Embroidery Patches for Your Brand?
Whether you’re creating patches for a business, sports team, motorcycle club, fashion brand, or promotional event, the quality of the patch matters just as much as the application process.
At Premium Quality Patches Custom Embroidery Patches, we manufacture premium custom embroidery patches with multiple backing options, including iron-on, sew-on, Velcro, and peel-and-stick. Our team can create patches in virtually any shape, size, and style, from classic embroidered badges to 3D puff embroidery and appliqué designs.
Turn Your Design Into a Professional Embroidery Patch
Ironing on a patch is easy. Creating a patch that looks professional, lasts for years, and represents your brand properly is where expertise matters.
If you need premium-quality custom embroidery patches with iron-on backing, our team can help bring your artwork to life with clean stitching, durable materials, and expert craftsmanship.
Request your free quote today: